Shopify sign shops: Creating your own neon signs
Shopify sign shops: Creating your own neon signs
Developing unique neon signs and indicators. The entrepreneur's guide to launching a sign firm. If you operate a neon sign store, you know how important it is to accurately fulfil custom orders to keep up with the industry's accelerated development. Providing customers precisely what they desire and exceeding their expectations will improve your reputation.
Personalizing a neon sign may be challenging, but the procedure need not be distressing. Read on to discover how to provide your organization with a distinct identity by utilizing your creative designs! This article will talk about the stages involved in creating customized neon signs for your customers. How to create unique neon signs by utilizing glass tubing.
Filling a glass neon sign's neon tube with neon gas or another noble gas produces the sign's luminescent appearance. Individual sections of glass tubing are bent and glued into place to create the sign's sections.
The cylinders are then filled with a trace amount of neon or another noble gas (such as argon, krypton, or other similar substances)
The passage of an electrical current through the tubes excites the gas within, causing it to discharge light and emit a brilliant glow.
Let's examine the various processes involved in creating a glass neon sign! Fabrication of Neon Light to Your Specifications You will need to begin by developing a detailed drawing of your concept. Before commencing the manufacturing process for your neon sign, you must have a comprehensive and well-defined design draught.
Using this design sketch as a guide, you can rest assured that your sign will appear precisely as you envisioned. It would help if you considered the dimensions of your sign in addition to its layout, colour scheme, and any text or images it will contain.
A rough estimate of the materials and instruments required for the current project is of great assistance. Having a comprehensive design drawing to refer to before working with the materials allows you to plan out the entire process and make any necessary adjustments.
This can help you save time and money in the long run by reducing the likelihood of making costly errors and enabling you to estimate the costs involved more.
Creating a comprehensive design drawing can be accomplished manually with a pencil and paper or digitally on a computer using Adobe Illustrator or Adobe Photoshop. If you do not feel secure sketching on your own, you always have the option to pay a designer to do it for you.
It will be simpler to achieve your objectives if you clearly articulate them and your expectations. The second stage is to collect all necessary materials, including glass tubes. As soon as you understand how your strategy will unfold, you can begin collecting the necessary materials.
The outline of the sign will be created at this stage using clear glass tubes of differing diameters. The dimensions and contours of the glass cylinders used in your neon sign must be accurate. Due to the bending and shaping required to make the tubes suit the design, they must be slightly larger. Due to the low strength of other forms of glass, soft lead glass tubes are used to manufacture neon lights.
These cylinders can range between four and eight feet in length
Borosilicate glass is occasionally utilized in manufacturing due to its exceptional resistance to high temperatures. The glass tubes to construct neon signs for specific stores or residences must be meticulously cleaned before any work begins.
Following this stage, the tubes are dried and briefly heated in a kiln to remove any remaining moisture and dust. The tubes may also be coated with phosphor or coloured, depending on the desired effect. Following the dry cleaning of the glass tubes, they are piled in the kiln to dry while the phosphor coating is applied.
At this stage, the glass tubes are produced by various manufacturers, some of whom colour the tubes. Sometimes, neon light glass tubes are not coated or coloured to obtain the desired glowing effect or desirable neon light colours. You will also require an electrode power source, a gas flame, safety eyewear, and a power supply.
In addition to a dimmer switch, a backboard, and mounting hardware, you should also consider purchasing a dimmer switch to adjust the level of luminance emitted by your sign. If you begin a project with all the necessary materials, you can save time and avoid obstacles.
If you plan, you won't have to fret about the difficulty and added expense of having to halt work on your project because you ran out of supplies.
There is a third bend in the tubing. The glass cylinders must now be shaped following the blueprint.
Using a sheet of heat-resistant asbestos, the sign's design can be created at full scale before manufacturing begins. Various burners, including gas-fired ribbon and hand torches, heat and soften the tubing to shape glass tubing.
Additionally, you can use a bending machine to heat the tubes to make them more malleable. Heat guns are an alternative option. A template made of asbestos is used as a guide to bend the tube by hand. Frequently, tube benders do not wear mitts at work.
This is because they must be able to sense the quantity of heat transmission and the degree of glass softening. When the desired degree of softening has been achieved, a blow hose is affixed to one end of the tubing, and the tube bender gently blows air into the tubing to return it to its original diameter.
Its diameter must be precisely measured to ensure that the tube serves its intended purpose. Frequently, large neon signs are assembled from numerous sections of glass tubing that have been joined together.
This is accomplished by heating the extremities of two distinct tubing lengths and joining them together
The shape and overall appearance of the sign are determined by how the cylinders are bent. If you want to accomplish the desired degree of bending in the tubes, you will need to exercise caution and stick to the concept of your design. To prevent injury, gas safety eyewear must be worn at all times, and the manufacturer's instructions must be followed when using it. In the fourth stage, place the electrode.
After forming the tubes into the desired shape, the electrodes can be attached. Due to the positioning of these minute metal plates at each end of the tubes, an electric current is generated. After heating one end of the electrode and inserting it into the tube, pressing it into place gingerly will be necessary.
Then, a tubulation is inserted, a small port that allows the tubing to be evacuated via vacuum suction. This port could be part of the electrode or a distinct component connected to the tubing. The placement of the electrodes is directly related to the efficacy of the sign.
Neon lighting requires a strong connection between the electrodes and the tubes to generate an electrical current and produce the desired effect. Because the improper insertion of the electrodes could result in injury or damage to the tubes, extreme caution and attention to detail are required.
Fifthly, projectiles are fired at the glass conduits
The blasting method is utilized to ensure that the glass, phosphors, and electrodes are impurities-free. Using a vacuum compressor, the air within the tube is evacuated to a pressure between 0.02 and 0.04 inches (0.5 and 1 mm) of mercury.
Due to the restrictions imposed by physical principles, a longer pipe required a lower pressure. An exceptionally high current transformer is connected to one-of-a-kind metal electrodes and conductors to increase the amount of current flowing through each tube from the standard 30 milliamperes to between 400 and 750 milliamperes.
Due to this, the electrode can reach up to 1400 degrees Fahrenheit (760 degrees Celsius), while the glass can reach up to 420 degrees Fahrenheit (216 degrees Celsius). The heat eliminates any potential contaminants. After that, the objects are extracted using a vacuum pump
The quantity of energy applied to the glass tubes during the production of neon light ultimately determines the light's brilliance and intensity.
You will need to conduct several tests and modify the power supply to achieve the desired level of brightness and consistency in the neon light you are employing. If the neon light is too dim or is not evenly distributed, altering the power source or the electrodes may be necessary.
The sixth measure includes an inert gas
After the electrical discharge has been created effectively, the noble gas should be introduced. This gas is necessary for the correct operation of the neon light effect. It is necessary to purify the gas for the sign to function properly and last for an extended period. Numerous options are available regarding noble gases, including neon, argon, and xenon.
Warm reds and oranges are produced by neon, the illumination option that is both the most affordable and the most accessible. Helium produces tones from red to pink, whereas Xenon and Krypton produce tones from purple to yellow-green tones.
Argon is also utilized in the production of blue neon signs. However, it has been tinted with mercury to increase its brightness because it emanates a dim light. When filled, a conduit with a diameter of 0.6 inches (15 mm) typically has a pressure of approximately 0.5 inches (12 mm) of mercury. Next, we apply heat to the tubulation port to hermetically seal it.
Seventh Stage of Ageing of the Tubes
After the gas in the tube has settled, it will function correctly. The electrodes are connected to a transformer with a higher current rating than the normal load so that they can manage the load. If a neon tube is employed, it will take approximately fifteen minutes for the light to illuminate fully. Processing argon may require a considerable quantity of time.
If there is a flicker in the gas or a hot spot on the tube, the tubing must be opened, and the filling and blasting procedures must be restarted. Add any accoutrements (such as a backboard or a dimmer) in Step 8 (for example, a backboard or a dimmer).
Now is the time to add the final details to your neon sign's customization. The tubes could be mounted on a backboard, and the light could be dimmed or adjusted according to the requirements. You may be able to enhance the appearance and functionality of your neon sign by adding certain accessories.
A dimmer control will allow you to adjust the brightness of the neon light to your liking, and a backboard will provide a stable and aesthetically pleasing mounting surface for the tubes. Consider how the additional design elements you wish to incorporate will affect the final product's appearance and feel.
Methods of Quality Control and Assurance Before a neon sign is mounted and installed, its quality and functionality should be evaluated. The subsequent step is to turn on the electricity and ensure the neon light shines brightly and stays illuminated.
You must ensure that the tubes are in excellent condition and that the electrodes have no cracks. A damaged neon sign is not only hazardous but also detrimental to business. Ensure that your neon sign is in proper functioning order before installing it by conducting a thorough test.
Determine if neon signs pose any risks to human health. This is the most effective method for avoiding injury while working with them. Tenth Stage: Mounting and Putting Everything Together The time has arrived to install and mount your neon sign.
To achieve this, you must mount the sign, turn on the neon light, and connect the power supply. Use the proper hardware when installing your sign to ensure safety and compliance with all regulations. The miniature neon signs are assembled and affixed on their respective frames in the workshop.
Larger signs can be mounted on a building or other support structure in sections, then connected and wired to form the entire sign. When it comes to large installations, additional time may be required. With LED Flex, you can create your unique neon displays! In the sign design known as LED Flex neon, light-emitting diodes (LEDs) are utilized to produce a similar effect to neon.
It is a strip of flexible LED lighting adhered to an acrylic backing
Modifiable aspects of the sign include its shape and dimensions and the colour and intensity of the LED lighting. This guide will lead you through the steps required to create an LED Flex neon sign.
Developing Your Very Own Unique LED Neon Sign! Create a detailed graphic design or template as the initial step. Before beginning the construction of your custom LED Flex neon sign, you should have a clear vision of its final appearance.
It is essential to possess a graphic design or template that specifies the size and placement of the sign. This may be hand-drawn, or it may be created with design software such as Adobe Illustrator. If you have a comprehensive plan, it will be much simpler to construct a neon sign that satisfies the established criteria.
The second stage involves assembling all required components, including the LED Flex light. The next stage in creating a one-of-a-kind LED Flex neon sign is to assemble all the necessary components. The price includes LED Flex illumination, an acrylic backboard, a CNC machine, cables, and other components, such as a dimmer switch.
Because LED lights are available in such a vast array of hues and intensities, it is crucial to choose the right one for your endeavour. Before beginning the project, ensure that you have all the necessary materials to avoid delays.
The final step involves cutting an acrylic baseboard with a CNC cutter
Since you have everything you need, you can adapt the acrylic backboard's dimensions to your design's specifications. Intricate designs can be etched into the backboard with precise precision using an instrument known as a CNC machine.
A computer controls this apparatus. If you want an accurately cut backboard, adhere to the template or design you created. The LED light strip should be modified to be attached to the acrylic backdrop in the fourth stage.
YouTube has provided this video. YouTube has provided this video. After the acrylic support board has been cut to size, the LED light strip can be trimmed to the desired length. First, you will need to determine the length of your backboard, and then you can reduce the light strip to the correct length.
Because the appearance and functionality of the sign depend on the precision with which the light strip was cut, it is crucial to pay close attention to the particulars when performing this task. The fifth stage is to solder the ends of the light strip to the attached wires.
After the light strip has been cut to the desired length, its extremities are prepared for the attachment of wires. To achieve this, soldering the conductors to the light strip is necessary. After this is accomplished, the light strip can be connected to the power source, and its intensity and hue can be altered.
Always employ the proper soldering techniques to ensure a safe and dependable connection. Utilise adhesives or ties to secure the led flex light strip in the desired location. After attaching the wires to the acrylic backing, the light strip can be affixed and secured with fasteners.
You can glue the strip in position or use zip ties to secure it. The ultimate appearance of the neon sign relies heavily on the alignment of the light strip relative to the template or design. Add additional components, such as a dimmer and a colour-changing switch, to personalize your lighting system.
At this time, you should install any additional features for your neon sign, such as a dimmer or a colour-changing switch. The installation procedure may vary depending on the type of component being introduced. If you decide to add any accessories, you must ensure that you do it following the instructions provided by the manufacturer.
The eighth step is to connect the power source, followed by a device test. Once everything is in its proper place, you can connect the power source and give the neon sign a test run. Connect the light strip to the power supply, then turn on the light strip to see if the neon light is functioning properly. T
est the sign in several environments, including variable degrees of contrast and ambient light, to ensure it displays the correct information and functions as intended.
Why is giving customers the option to customize their neon signs so crucial?
It is crucial to enable customers to personalize their neon signs for several reasons, including those listed above. It allows customers to create tailored signs to meet their requirements and preferences. This can be quite helpful for businesses trying to build a unique brand identity and for people constructing a sign to convey their own distinctive sense of style.
Customers can have their neon sign customized to the precise dimensions, materials, pricing, and requirements of their area, allowing the sign to fit correctly and look its best. Our "Neon Sign Product Customizer" software is the way to go if you run a neon sign store on Shopify and want to provide your clients with more customization options for the signs that they buy from you.
Your Shopify customers will get instant access to a robust editor, allowing them to build and customize their neon signage. Customers can create one-of-a-kind neon signs based on their likes and preferences by choosing from various colour options, text styles, and material varieties.
Before consumers purchase a personalized neon sign, the software also provides an estimate of the cost of the sign for them to consider. If this choice is presented to customers, there is a greater chance that they will be pleased with the completed purchase and a decreased likelihood of asking for a refund or an exchange.
You may find our app in the Shopify App Store, where it can be installed quickly and uncomplicatedly. This is just wonderful!
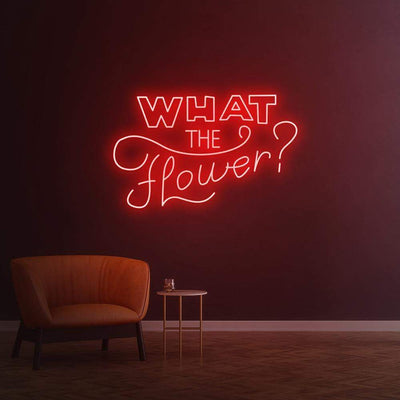
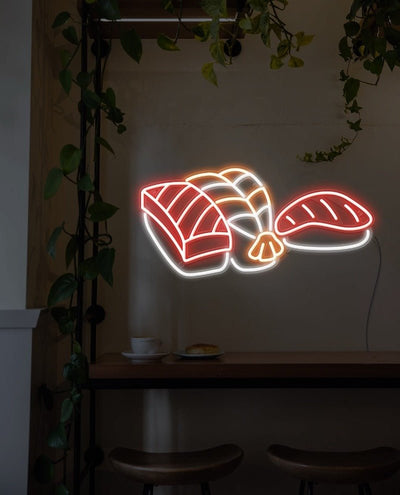
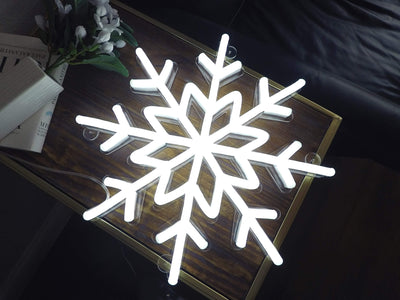
Let's have a look at the sneak peek, shall we?
Conclusion Making bespoke neon signs requires careful planning and execution at each stage. Shop owners that invest in studying the ins and outs of fabricating bespoke neon signs have a greater chance of providing their clients with items that those clients genuinely want to buy.
If you read this article carefully and follow the simple steps laid out for you, you can make stunning neon signs that your customers will adore. We hope you can use the instruction booklet we provided to produce illuminated signage.
If you found this post helpful, please consider forwarding it to others and subscribing to receive notifications when new articles are published.